Untamed Vintage: Pioneer HPM-100
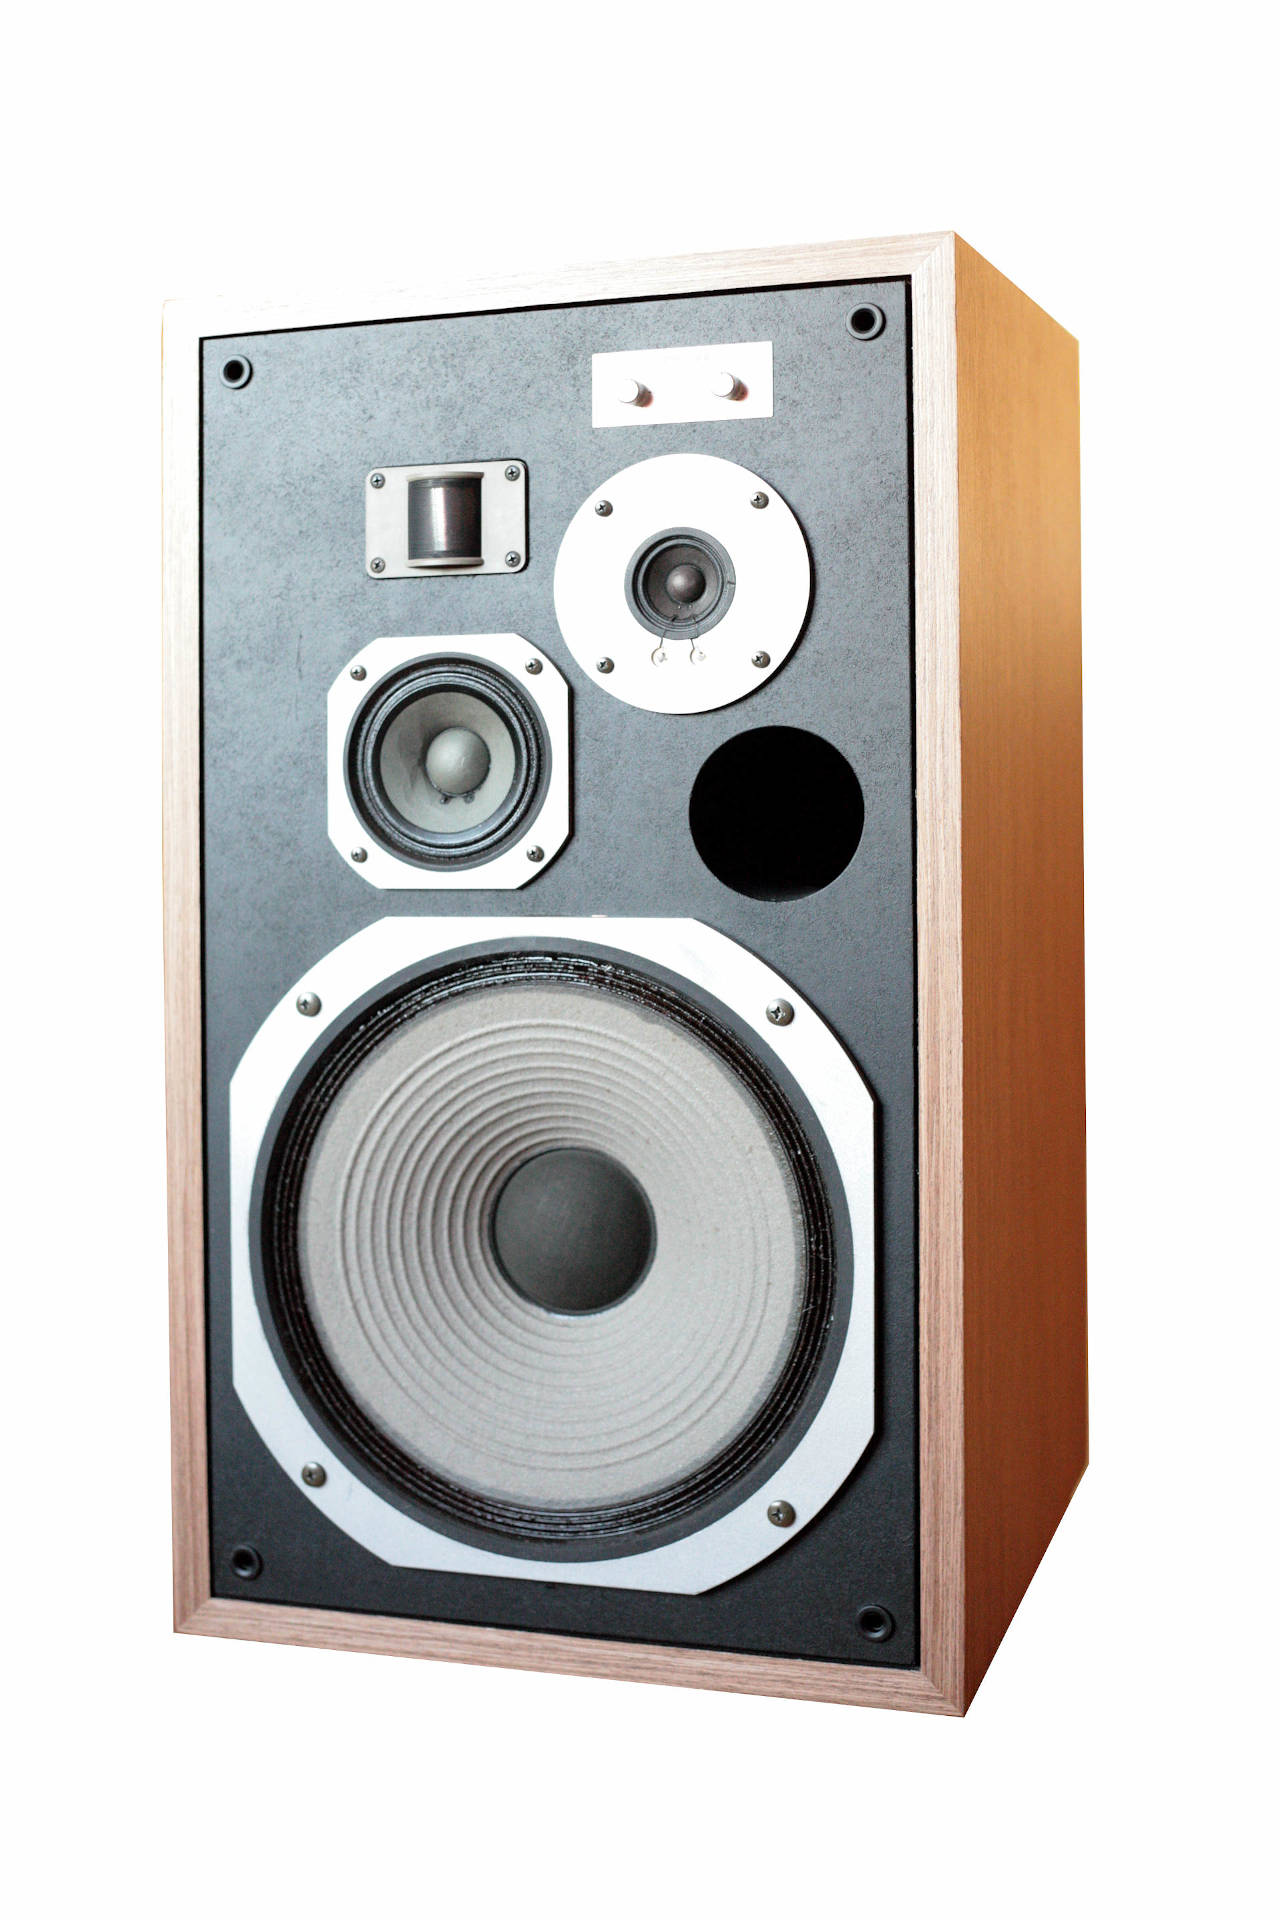
I guess nobody needs an introduction to these speakers, they’re iconic pioneer HPM’s from 70’s. Arguably the last “real” speakers made by Pioneer, before consumerism and tide price tags hit the market. Legend says that Bart Locanthi, head of engineering at JBL and a creator of all time best seller L-100 Century, came to Pioneer in 1975 and made HPM series as direct rivals for JBL monitors. And sure as hell they did their job by grabbing their market share and all the rest is a history.
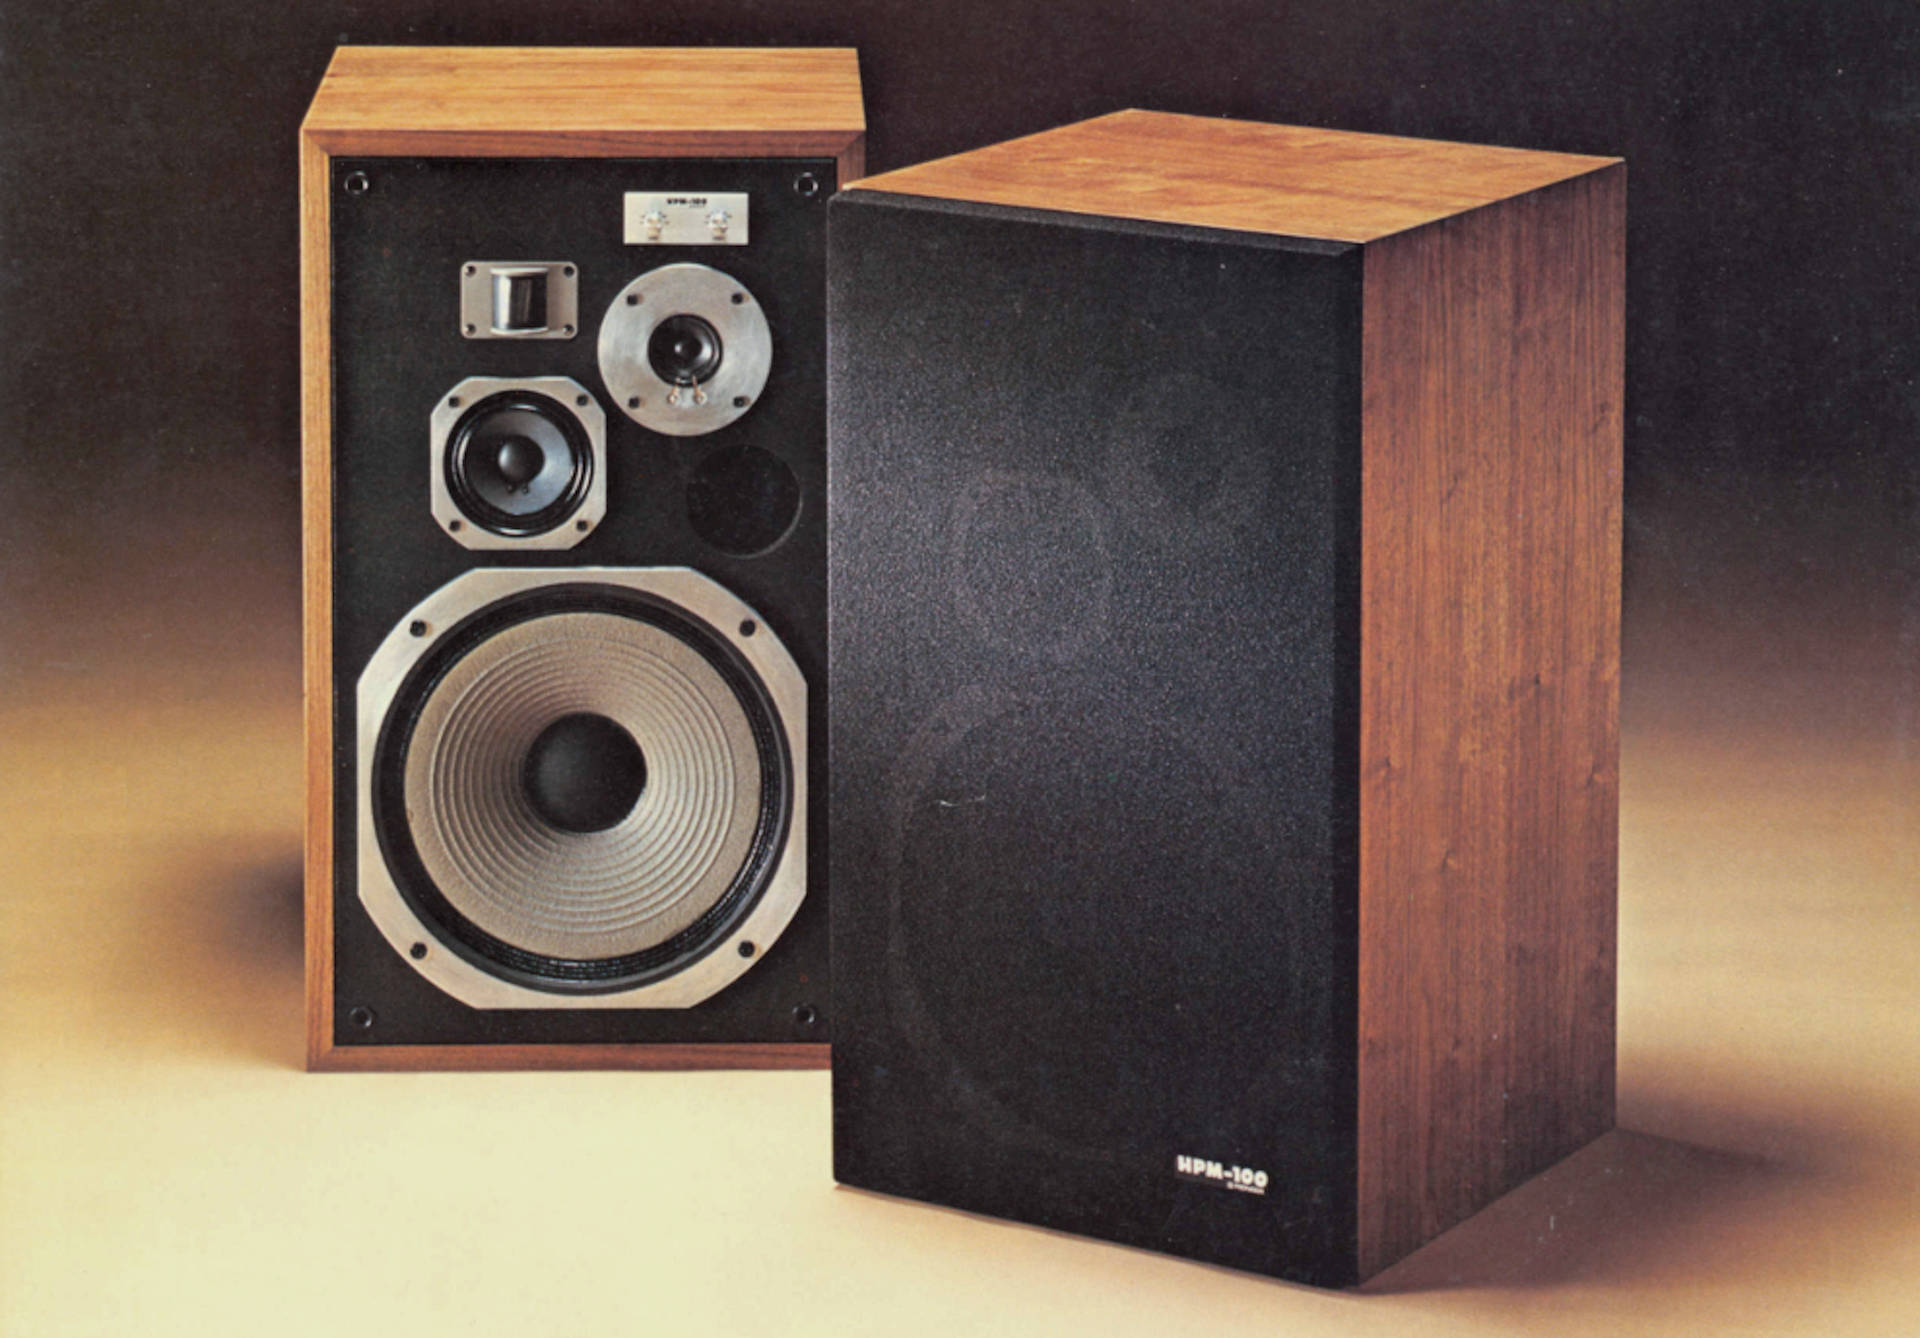

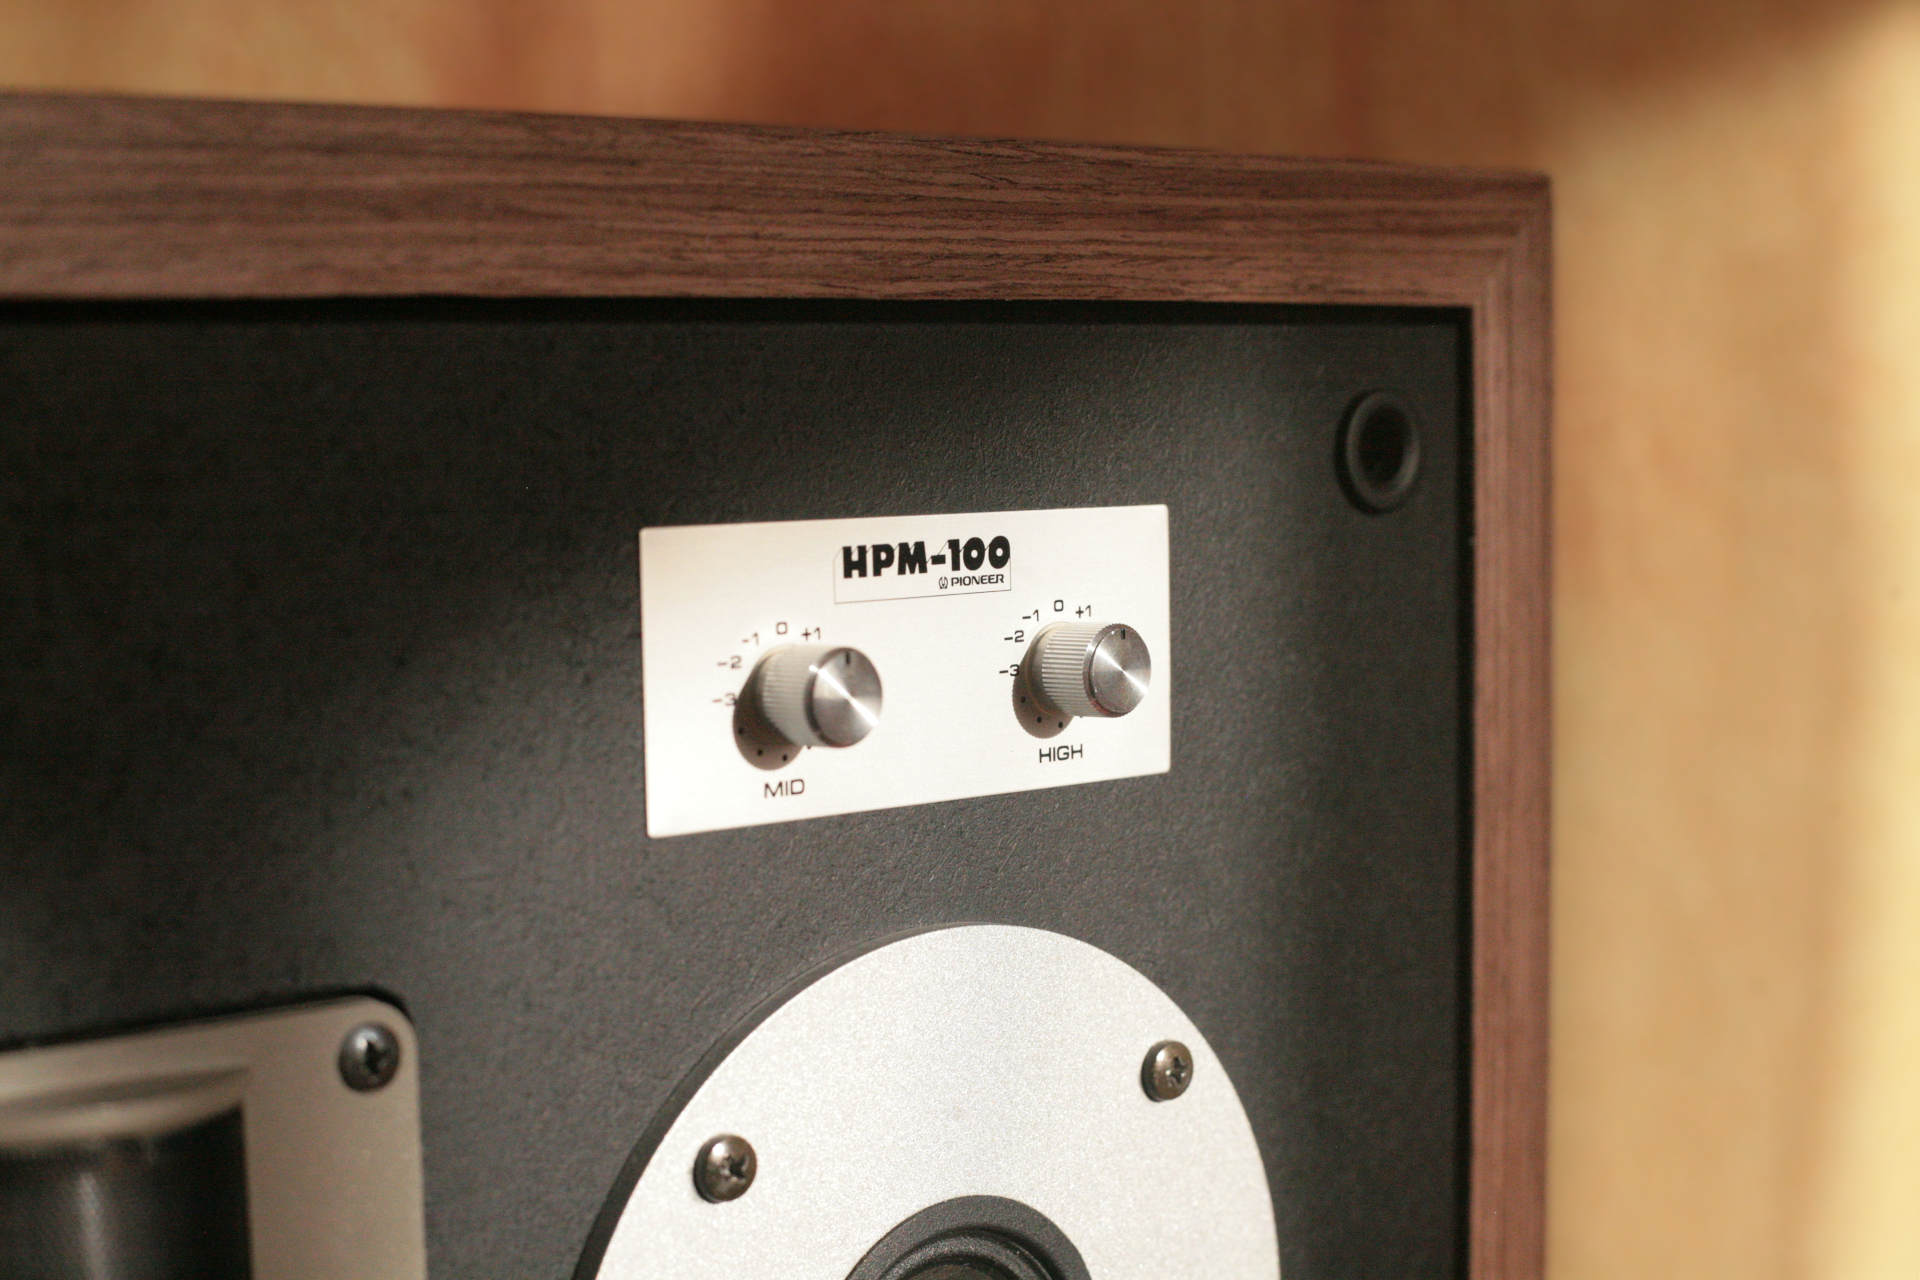
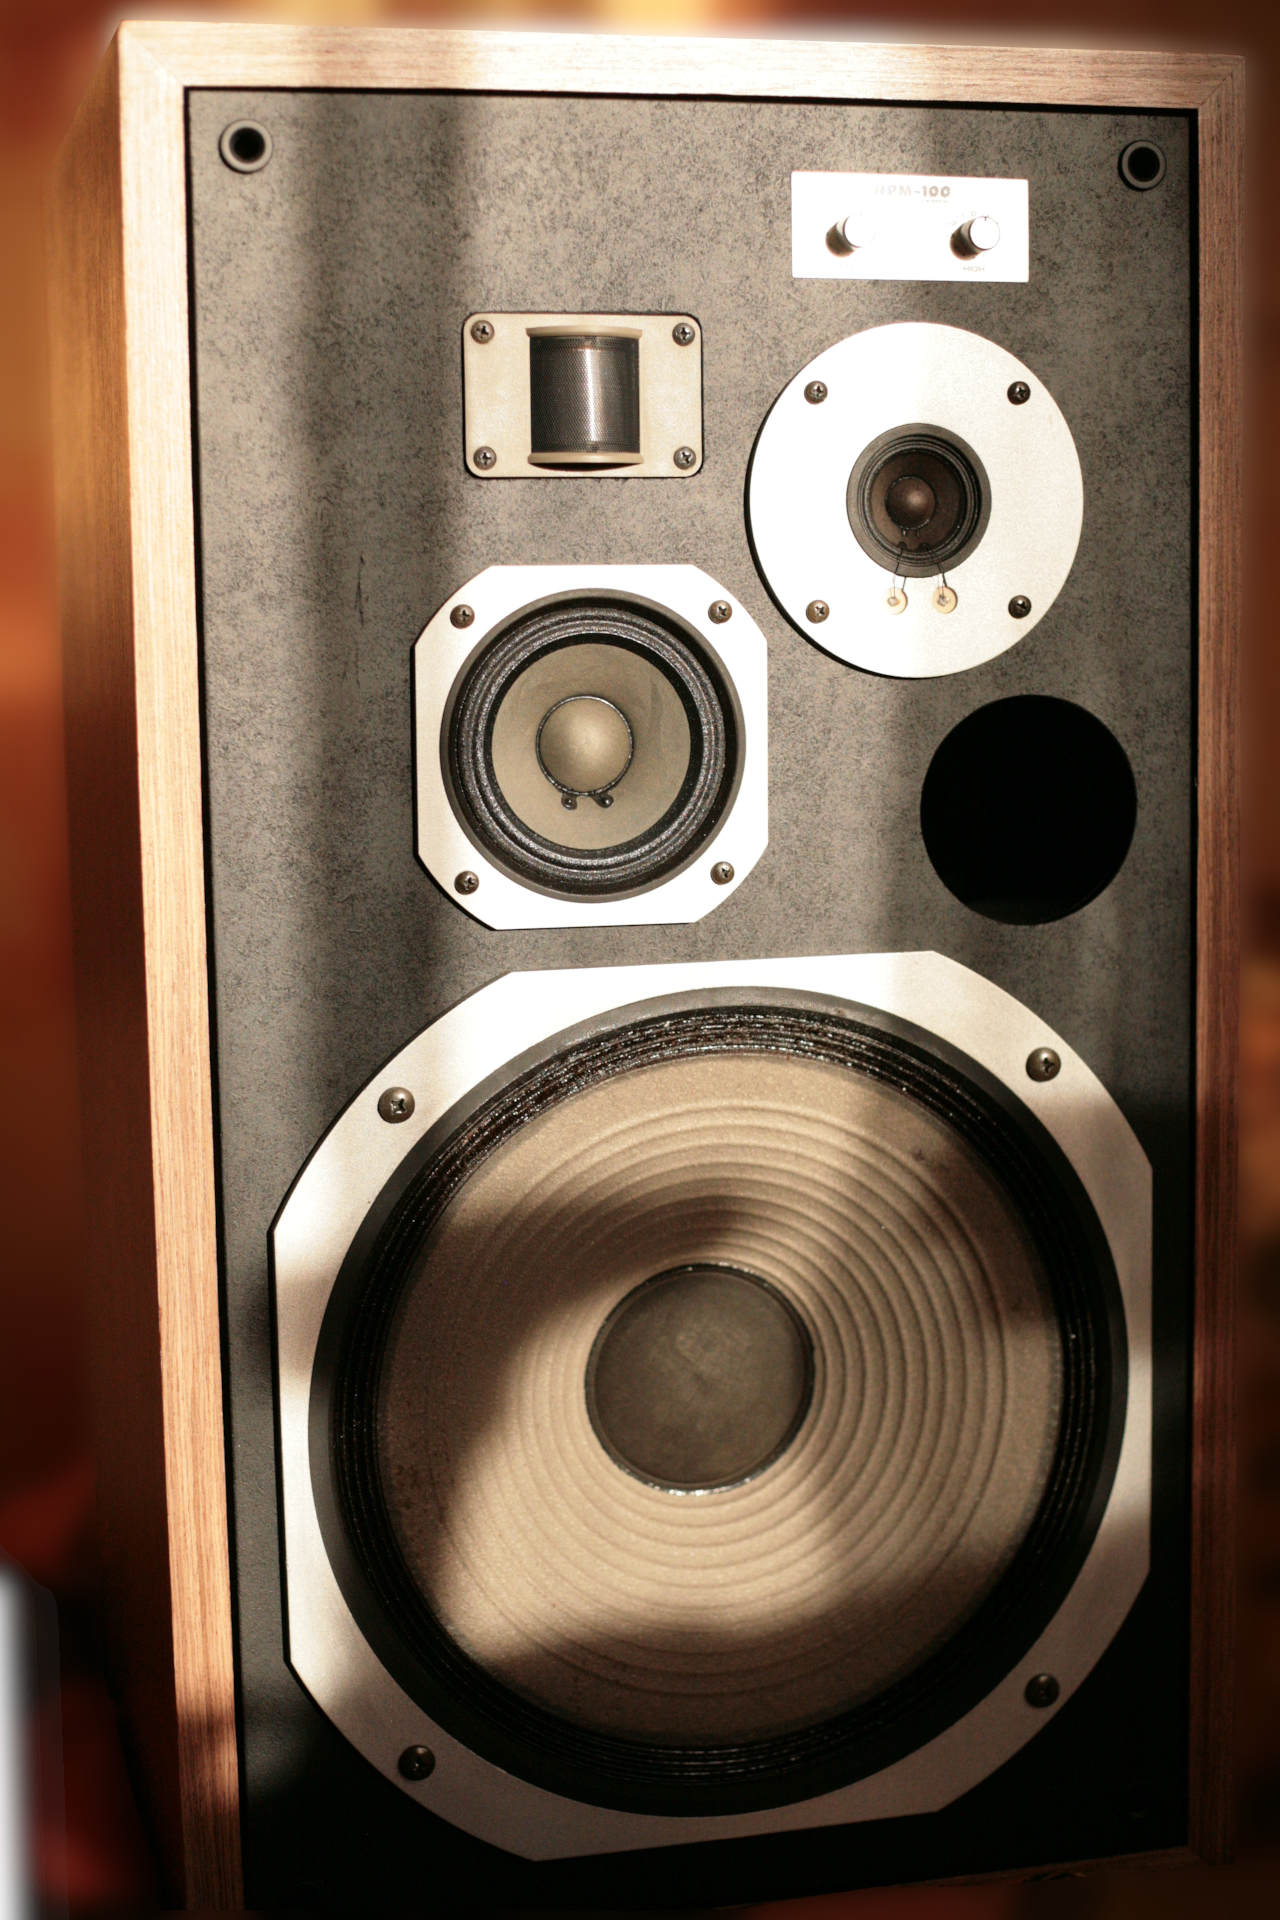
Beyond any doubt these are quality build speakers and you feel it right away, at whooping 26.7kg of weight your back is first to notice this. In contrast to other “paper” boxed Japanese speakers of that era it’s quite remarkable craftsmanship at a mass production scale. I would have a hard time naming any other mass produced speaker that came with 50mm face-plate. JBL influence can be felt throughout all aspects of this speaker and I will look into driver similarities and crossover performance a little bit later.
The patient arrives
With all the buzz and controversy on “HPM sound” that surrounded these speakers all these years, I couldn’t say no to a friend of mine who brought me this particular pair for restoration. It was a nice score considering price paid, but sure enough they had seen better days. Sorry, I didn’t take any hi-res before pictures, but main complains were:
- Cosmetics – remember ladies and gents, speakers are not meant to be used as flower tables. Or any type of tables for that matter. Round plate and water marks were visible on all sides. Scratches on a black face-plate.
- Trashed mid driver – 25 years is a lot of time. Basically it’s more then enough to raise a kid. And then you can have a beer or two with him and say look, remember when you were six and beat the crap out of that pioneer mid-range of mine? And have a good laugh right there. I’m sure something similar happened here.
- Crackling sounds – bass units were main suspects but it was hard to pin point exactly as you needed higher SPL’s to reproduce the effect. But wait, what’s that ? Oh look, it’s a hole !
- Headaches – after listening to these speakers for a prolonged period of time. This made me laugh quite hard actually and I kid you not, these were his exact words.


And sure enough, after hooking them up for the first time and listening for a couple of minutes I could tell that something was seriously wrong here. One word would spring to mind – mess. Capable of causing uncontrolled headaches? Could be the case. Anyway, it was about time to unpack my measuring mic and look at what was going on.
It’s time to measure
First, my trusty disclaimer.
Measurements are just that – measurements. They are meaningless without context. I see people to often emphasizing on numbers and graphs and I strongly advice against this over-interpretation. They don’t tell us anything about how good or bad particular peace of gear will sound, unless it’s seriously flawed. There is so much more to good sound reproduction and it’s way more subjective then any graph can tell us. When it comes to speakers – it’s a very efficient tool to get the basic stuff right. We can easily see energy distribution in certain areas and have a good clue about tonal balance. Large cancellations, sharp distortion peaks and funky CSD graph will instantly give away serious flaws with drivers and filters. Box simulations and in-room far-field measurements will give us a good feel of bass extension. Sensitivity graphs combined with a real speaker impedance reveals how easy particulate speaker will be to drive for an amp and etc. Without this clean bill of health all further subjective discussions are meaningless and pointless. However. They will not tell us anything about speakers ability to resolve micro-details, the level of transparency, picture dimensionality and specific sonic signature. Nor they will show the impact of different quality cross-over components. Cap is a cap, right? A much deeper level of analysis, together with a proper psycho-acoustic knowledge are required to extract anything meaningful from a raw data. And achieving this goal is a long-term objective of mine.
And then – oh lo and behold, the first SPL measurements of glorious vintage marvels!


dBSPL @1Meter on Tweeter axis, 1/12 octave smoothing, 4ms gate window. Blue – right, red – left speaker. Both attenuators at 0dB.
Wow. This looks really horrible. But if you ever designed crossover (and knew what you were doing) – this should look too familiar. Yes, it’s a “litmus” test. By reversing one driver’s polarity and looking at the depth of a newly formed dip, it’s easy to judge about driver integration quality at a crossover region. This is exactly what is visible above. Someone took out both mid-range drivers, reversed polarity and put them back for your enjoyment! Yeah, but why you may ask?


Well, actually it’s not that hard to mix wires when reconnecting mid’s. White wire goes to a positive terminal on mid-range, when on tweeter and woofer it goes to negative terminals. Go figure. This is what we get with correct mid polarity.


dBSPL @1Meter on Tweeter axis, no smoothing, 4ms gate window. Blue – right, red – left speaker. Both attenuators at 0dB.
Now that’s more like it! I just wonder for how many years someone listened to these reversed mid-ranges… It might be the reason why they decided to sell them. There are still a lot of problems clearly visible, but at least they started to sound like a pair of speakers and not some ambulance sirens. If you heard sweep sine as many times as I did – you know what I’m talking about here. We can definitely cross out headaches from a complaints list. Something really funny is still going on at woofer to mid crossover and the top end is all over the place. But let’s forget it for now.


dBSPL @1Meter. 1/12 octave smoothing. 4ms gate window. Tweeter axis. Mid attenuator at +3dB, High +2dB. Near field stitch @200Hz.


From a 1977 US promotional brochure. No details provided.
Measured frequency response on tweeter axis and published in brochure . I’m was quite happy with a resemblance. Let’s ignore for now that dip at 1kHz. We will find out later what’s going on there. I can’t imagine anyone listening to these speakers at these “+3dB Mid, +2dB High” settings. I could barely listen to a sweep test tone as my ears started hurting immediately.
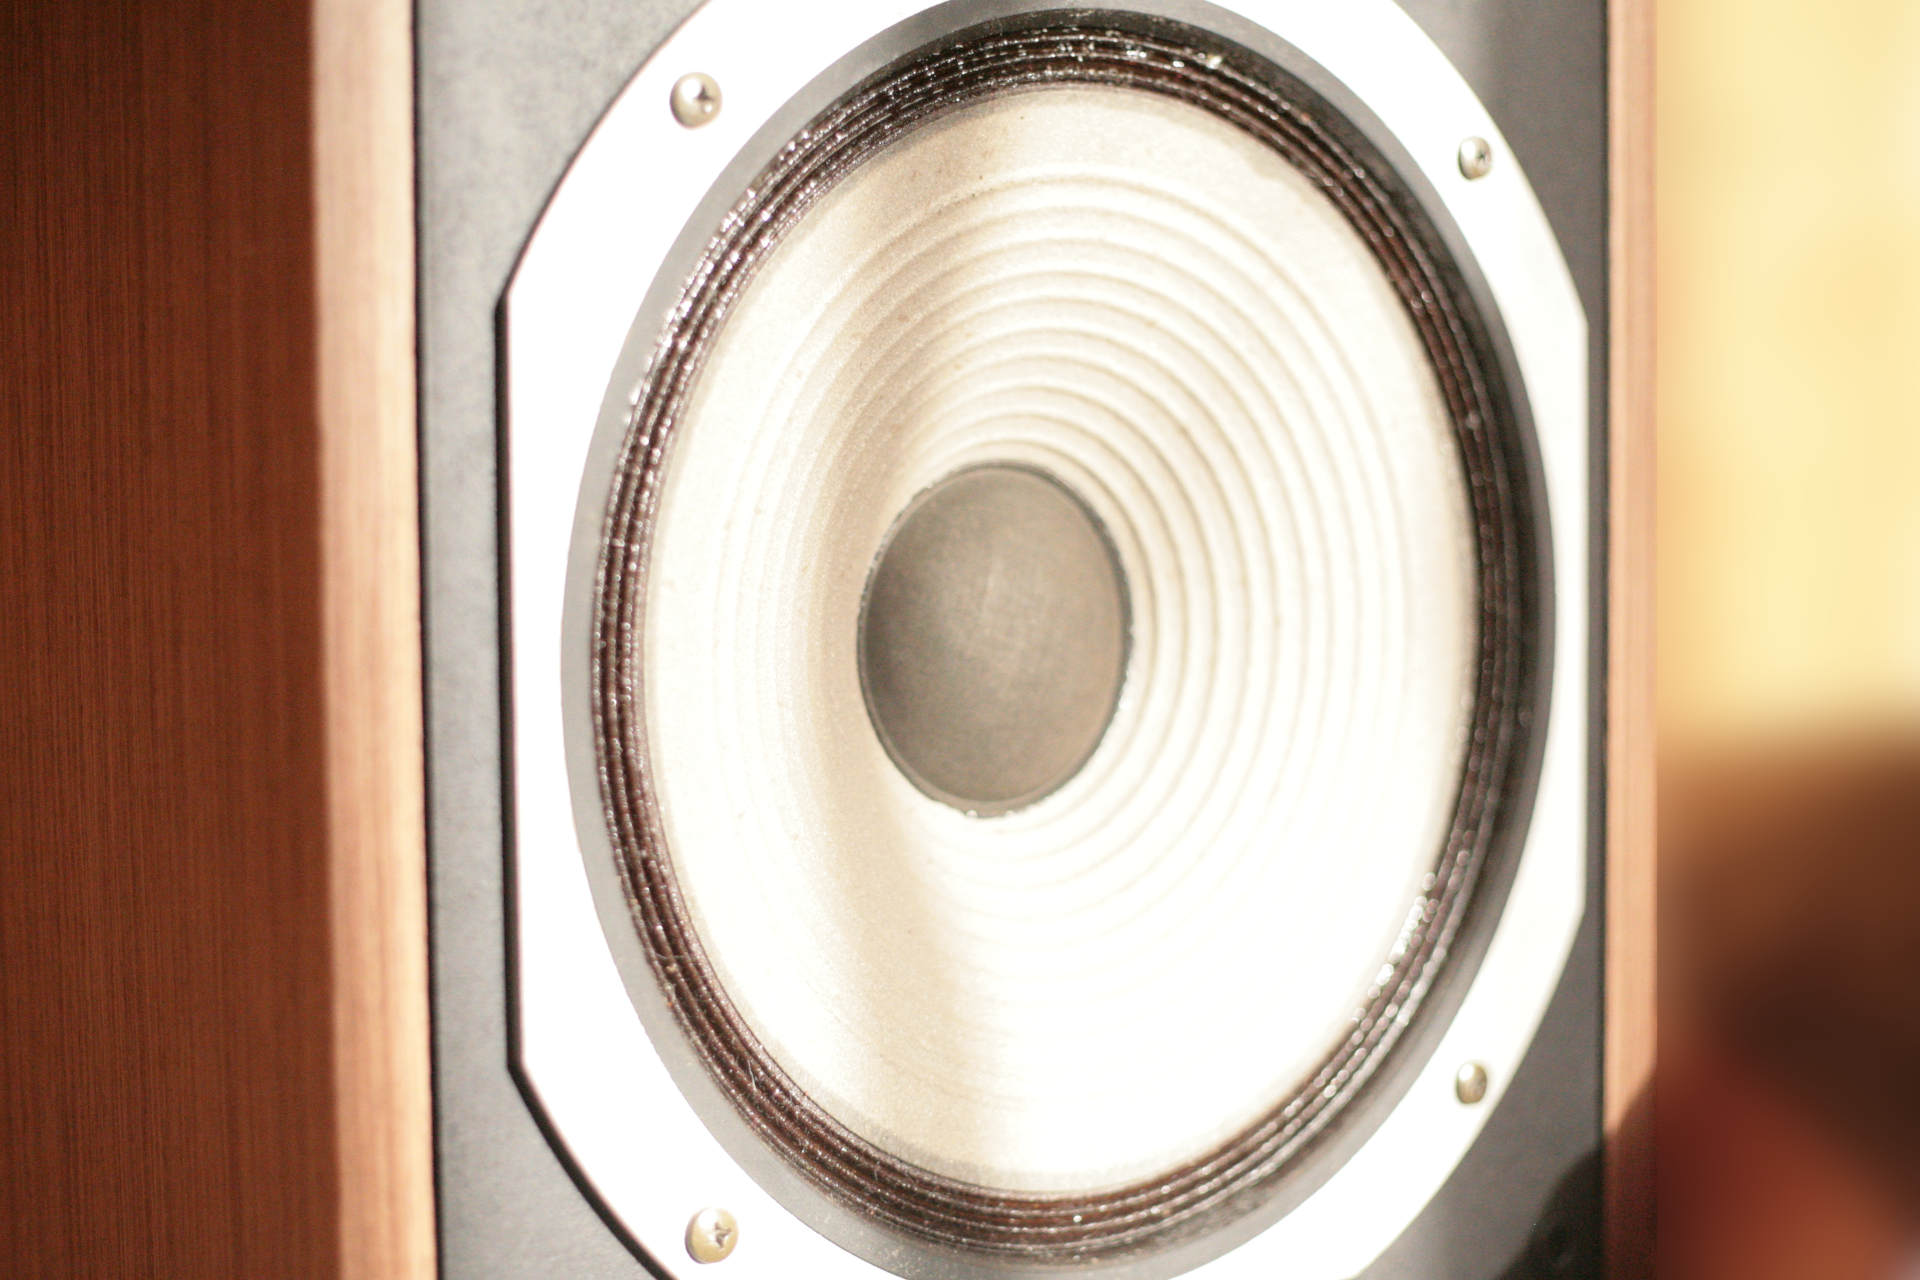
The whistling woofer
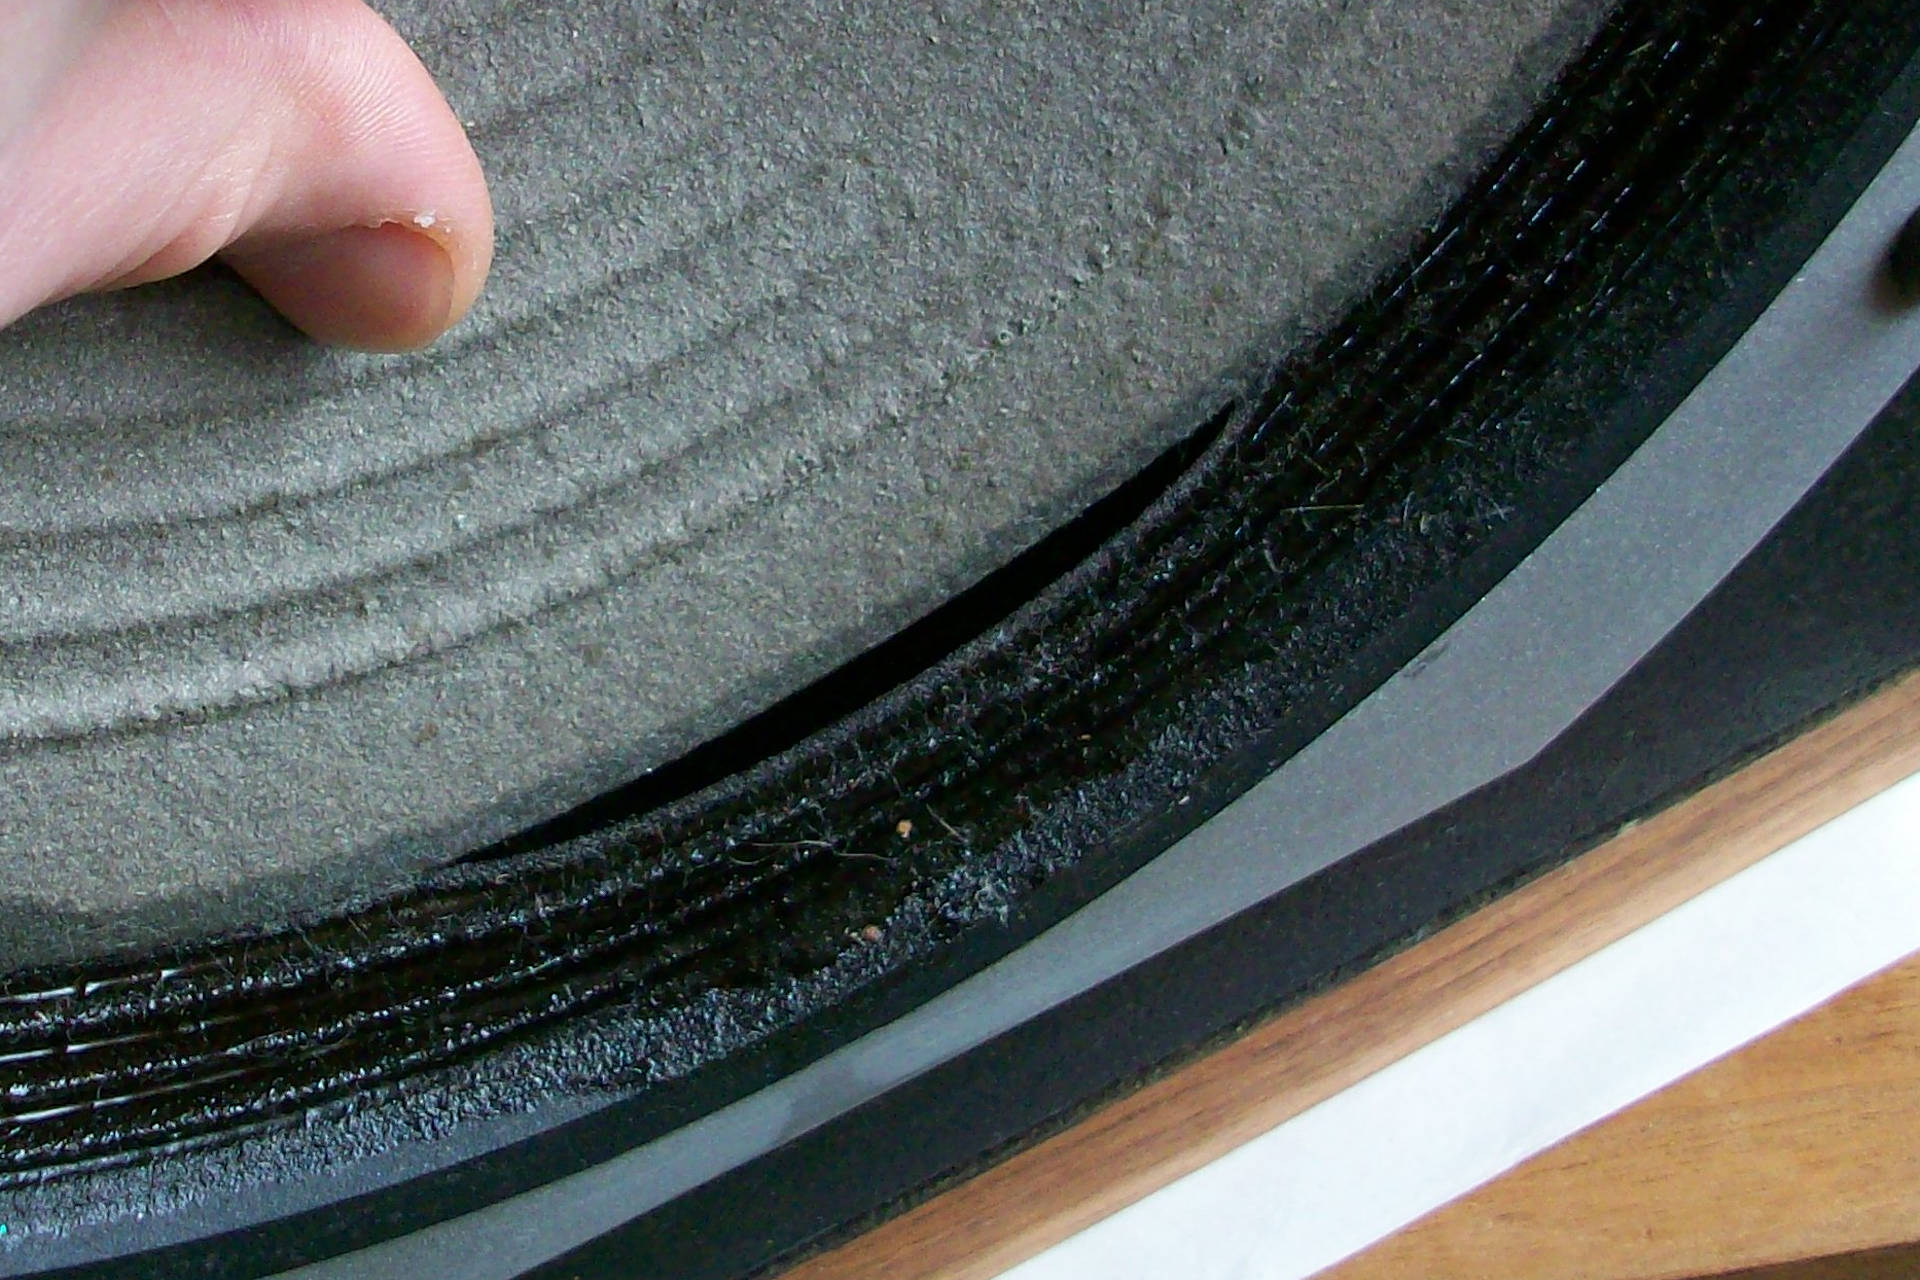
What an unpleasant sound this poor driver produced! And who would’ve thought that being air tight is so important…(pun intended). After closer inspection it was clear what was happening. Textile surround is heavily impregnated with this viscous goop (something phenolic resin based?).


It was meant to make textile air tight and dampen surround, but during last 25 years it has slowly flowed down and accumulated on bottom part filling all those waves. This has blocked cone movement in that area and after some time textile just gave up. Repair is quite simple.


First we have to remove excess impregnation. Hairdryer and fat tweezers work wonders here. Just be very careful not to make any more holes in a surround. Next we apply several coatings of rubberized PVA adhesive that you can buy on various online shops and auctions. Usually it’s called something like “speaker repair glue”. Plain PVA paper glue will suffice too, but longevity will degrade because PVA is too hard when fully cured.
The mids crisis
So one of the mid-range drivers has fallen a victim of time. This possessed a problem technically as well as aesthetically.


The dust cap is replaceable and could be salvaged from a similar driver. But the cone has taken more abuse then it can handle. There were a lot of wrinkles on one side and as a result cone eccentricity was compromised. This meant that at larger excursion voice coil was touching the magnetic system and is no longer properly aligned in a magnetic gap.
Here is a riddle for you. Don’t look at the descriptions and tell me which one of the drivers is damaged by looking at SPL graphs ?

dbSPL@1m, 4ms window, good driver (red), damaged driver (blue).
For sure blue graph looks better 🙂 This is because busted dust cap is no longer able to produce those horrible breakups in 10-20kHz range and non-uniform cone rigidness is much more well behaved at it’s 5-10kHz breakup range.

THD@1Vrms. Black – Total THD, Brown – Fundamental, Red – 2nd, Ligh Brown – 3d, rest – higher order harmonics.
Unfortunately distortion graph tells a different story. You can clearly see how a higher order harmonics are creeping in at critical 1-3kHz range of a damaged driver. This will be audible. Distortion hump @300Hz is expected here as this is fs of a driver.


So a hunt for new Pioneer 10-721* drivers was on and after some time this nice used pair landed at my door steps. Not cheap, but at least there was something to choose from. HPM-100 was and still is very popular. And so the crisis is over.
The make over
There was one last major problem left – speakers still looked horrendous. And we all know that ugly speakers don’t sound good! 🙂 It’s a psychological thing first and furthermost. People still listen a lot with their eyes. And I’m not going to tell anyone how they should listen. So something had to be done.


American dark walnut (left), Straight grain walnut (right).
New cabinets were out of the question so a fresh veneer job it will be. The executive decision was made to go with a walnut veneer. But I had no idea that they came at such a variety?! After some back and forth I’ve gone for a more contrast with a black faceplate and choose a lighter straight grain one. It will get much darker after applying semi-mat lacquer.


Now I’m not a big fan of a woodwork. Probably because I’ve done much more woodworking in my lifetime then I wanted to. So I haven’t made any photos of me applying this veneer to cabinets, but it’s not rocket science. Cut out oversized veneer parts and plan how to do corner over-cuts. Watch out for a pattern orientation. Apply PVA wood glue on veneer parts and cabinet walls and let it fully cure. Take a simple clothes iron (you won’t be ironing clothes with it anymore), set it for ~200C and iron down veneer sheets to a cabinet. Practice on something else to get a feeling of the process if you feel like it.
Tricky part is to do corners. Use office knife with a good quality blades. On final over-cut go a little bit over the edge and finish with a sanding paper. That’s it. The resulting bond is so strong, that the only way you will peel this veneer off is with a half of the MDF board. Trust me. I know.


If woodworking gods were benevolent that day, you should end up with corners looking like above. I also applied 3 coats of TIKKURILA Paneeli–Ässä water based semi-mat lacquer ta a new veneer. Then front panel got a fresh paint job with a general black-mat spray paint. That’s when things started to look promising!
Box analysis
Speaker “in room” performance is a separate can of worms that one day I hope to tackle in this section. Speaker box design and it’s room placement plays a decisive role to how much bass we are experiencing. But for now let’s try to simulate HPM-100 box and see what we can expect from it in a real life situation.

Pioneer 30-733A-1 woofer TS parameters were calculated using added mass method. After plugin them in a LspCAD, we have a following situation.

Half space (2Pi) SPL at 1m distance.
The resulting SPL response in factory 68L cabinet has a 3dB peak at 65Hz. This is confirmed by a near-field measurement and can even be seen in a promotional brochure. What this means is – don’t place these speakers in room corners! In that position and with a full floor gain you are looking at some +7dB in a 50-100Hz range. That’s a straight road to a “boom-box” heaven. Place them on some stands at least 50cm from a floor and give some breathing space from a nearest walls. Some more box stuffing with damping materials can help too. Also you can experiment with a little bit of foam in vents.


Other then that I have no complains. For a mass produced item this box is a mighty impressive specimen. I mean, just look at that massive face-plate!
Old cross-over
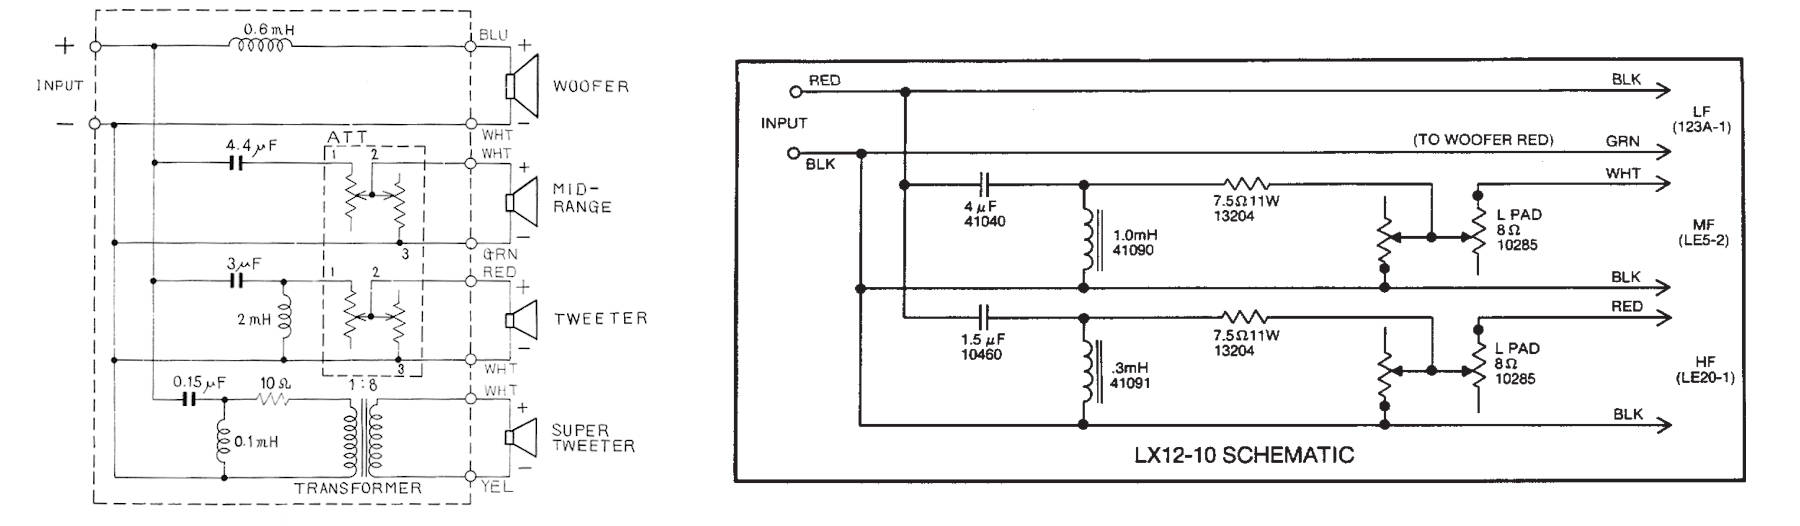
I started this article with a promise to search for a JBL DNA transfer to this design and it’s most obvious when looking at a crossovers of both speakers.


HPM-100 original cross-over (left), JBL L100 century original cross-over (right).
This is what you get when you can design your own drivers – simplicity. Pioneer didn’t feel as adventurous as JBL to go with no filter on the woofer, so they used a first-order filter with just a 0.6mH inductor. But they did so with a mid-range! So just a cap there. And then both speakers have 2nd order high-pass on tweeter. I always had my reservation regarding such a primitive networks. It can work on a specially designed drivers for a 2 way. But for a 3 way speaker ? “I Want to Believe” poster said on one’s famous FBI agent cabinet wall …

Woofers: Pioneer 30-733D (left), JBL 123A (right). Tweeters: Pioneer 45-711C (left), JBL LE5-2 (right).
Story continues with the driver units themselves. Now look above and tell me with a straight face that this is a coincidence 🙂 One day I hope to get my hands on these JBL drivers and compare my measurements. But I don’t think that they will be radically different.

Mid-range: Pioneer 10-721A (left), JBL LE5-2 Alnico (center), JBL LE5-12 (right)
There are some discrepancies with a mid-range drivers. Original L100 Century used glorious LE5-2 with Alnico magnet and much better mechanical construction then 10-721A. There is no comparison between the two. JBL LE5-12 – the modern (read cheaper) version of LE5-2 with a ceramic magnet. That’s what 10-721A is based on.

dBSPL@1m, 4ms window, no smoothing. Black – total, Green – woofer, Red – midrange, Blue – tweeter. Attenuators +0dB.
Here is how original crossover performs. What a wreck! And at the most important 1-3kHz range. At least we already know that reversing mid-range makes things even worse. You are probably wondering were is a super-duper-tweeter? Well, I got bad news for you. It’s purely for aesthetics and sales. Or maybe I should put sales first. It’s some 10dB lower and out of phase from other drivers. It starts doing “something” at 12kHz but I can’t hear it. My dog can’t hear it either. So I’ve done most reasonable thing here and just disconnected it. I don’t know why I didn’t save it’s measurement, but it is what it is now. Let’s move on.

dBSPL@1m, Tweeter axis, 4ms window, no smoothing. Green – woofer, Red – midrange, Blue – tweeter.
Here are individual drivers. Woofer’s roll-off is not that smooth (at least on this front panel) and it breaks-up badly at 5kHz. Tweeter obviously doesn’t want to go any lower than 4kHz and mid-range is pretty well behaved. Let’s dive deeper.
No sims in 70’s
But we’ve gone a long way since. So let’s drop our drivers measurements to LspCAD and see what’s happening more closely.

HPM-100 original cross-over filter.
In LspCAD I replaced front panel attenuators with passive resistors and tried to match measured SPL at “0” positions. Not an easy task but double.

dBSPL and Phases @1Meter. Blue – woofer, Red – midrange, Green – tweeter.
But what is this? Looks nothing like previously measured SPL response. Unless… Other driver polarity was wrong too! Now this is starting to get really frustrating. And to makes things even worse – Pioneer decided that they can’t be bothered to mark the polarity at the tweeter terminals.

Impulse responses of inverted (green) and correctly connected (blue) tweeter.
So I made individual driver measurements and imported them to LspCAD with correct polarity. That’s because I always check the impulse response and adjust accordingly. But when I measured old crossover – I didn’t check it. I mean, what are the chances that someone reversed mid-range and also tweeter polarities? Well… It appears they are pretty high.

dBSPL and Phases @1Meter. Inverted tweeter. Blue – woofer, Red – midrange, Green – tweeter.
With inverted tweeter network our SPL closely matches previously measured one. So I was totally confused at this point. How the hell this speaker left the factory ?

Well, at least according to wiring diagram – positive right tweeter terminal (red) becomes white and goes to negative terminal at crossover board. Green wire from positive mid-range terminal goes to negative terminal at crossover board too. So they both are inverted. But that is in direct contradiction to schematic diagram were all drivers are in phase! OK, my head is spinning now. This mystery is hopeless.
Update: I received this schematic from a reader which clearly shows that his original units came with midrange and tweeter drivers inverted! So my first SPL measurement was correct. And service manual schematic is wrong. Insane.


Now let’s take closer look at SPL graphs.
dBSPL@1Meter. Inverted & correct tweeter. Blue – woofer, Red – midrange, Green – tweeter.
I included both graphs on purpose here. Bottom line is this – no matter how you connect the tweeter and midrange – it’s either way wrong! Our mid-range is trying to be a full-range here and play the same program as a tweeter does. But there is no way two very different drivers can be coherent in all this frequency range! So to makes things look smoother and even out massive cancellations, woofer is forced to go all the way up to 3kHz. My gosh. What a mess.

Phase@1Meter. Inverted&correct tweeter. Blue – woofer, Red – midrange, Green – tweeter.
Phase plots tell the same story. All drivers are basically doing their own thing here. Phase tracking between tweeter and mid-range is no better or worse with polarity change. Now I start to wonder, is this the reason why they didn’t bother to mark the polarity on the tweeter in the first place? I don’t know.
The sound
I will try to make it quick. I never measure speakers before listening to them. Call it “unbiased first look” if you will. This time of course this was not possible, because of “mid-range crisis”. Having replaced damaged driver and connected it correct way I did my first listening session. And I was not impressed. I thought something surely must be still wrong. So the investigation of old cross-over performance was on it’s way.
Now, after fiddling around with old cross-over and finally having all drivers connected as they came from factory, I did another one. And nothing has changed. Only this time I could pin-point exact problems more accurately.
But let’s start with a positives. Because there is some. Otherwise people wouldn’t pay such a money for them these days. Let’s start with dynamics – there is plenty of it. Running mid-range with just one cap has is merits. There is certain liveliness and sparkle that you only get from a proper full-range. This LE25 clone tweeter, despite it’s measurements, does it’s job very well too. Upper treble is smooth and there are no problems in top-octave (even with those peaks). Having 12″ woofer playing all mid-range and lower treble is something special too and it must be experienced to describe it properly. Bass is plenty and it’s not boomy (with proper speaker room positioning). So it throws a charming and fun image at you and screams – “buy me and take me home!” And that what gets people hooked.
However, after just a couple of minutes you start noticing that there are a lot of things wrong with this image. It’s very dimensionless and flat. There is no separation between instruments. Everything is cluttered and in one plane. So any classical peace is coming out like a crooked and very dirty mirror through these speakers. Then, no matter how you set up front panel attenuators – there is no proper mid-high balance. It’s just always stuck with “loudness” switch on. And we finally come to vocals… they just doesn’t sound right! Period.
So in one sentence – good for party and just casually filling space with music and not for any kind of serious listening.
New cross-over
Having done proper listening session and measured individual drivers – I was convinced. A lot of engineering went into these old drivers and they can do so much better. It’s just a proper cross-over network that they need. The one designed not to sell these speakers but to reveal their inherent potential.
So I put a substantial amount of time in designing a new cross-over network. And after numerous simulation iterations and actual listening sessions – this is the result.

New HPM-100 cross-over network.
Here is a connection diagram for those builders that are having problems with reading crossover network schematics. Spreadsheet with components and links to parts-express order pages can be downloaded here.


Connection diagram for new HPM-100 cross-over network.
We still have a 1st order filter on woofer, but now with some impedance correction to keep phase tracking to mid-range driver. Nevertheless, it still handles mid’s and a lot of lower treble, thus staying truthful to an original design idea. Mid-range again can get away with just a cap for high pass and 2nd order for low-pass. RCL is there to help with phase tracking the tweeter, which runs simple 2nd order. It can be made much more complex to even out SPL in top octave, but I didn’t find it to be a problem sonically. So simple 2nd order it stays.

R3021 and R2011 influence for new HPM-100 cross-over network.
Overall voicing is on the bright side, so increase R3021 to better suit your taste. Also ever so important midrange level can be attenuated further by increasing R2011 to 14,16 or even 18Ω. All coils except L1101 should be air coils with no larger resistance then indicated. All caps – audio grade PP and as good as your pocket allows. I recommend at least Jantzen Standart Z-Cap’s (C1021 can be Cross-Cap).

dBSPL@1Meter. Blue – woofer, Red – midrange, Green – tweeter.
A lot of changes in SPL graphs. Most important is absence of any traffic jams. Woofer is following a smooth 2nd order roll-of from 1kHz fc, and it’s break-up at 5kHz is no longer a problem. Mid-range is not trying to play top-octave and fail there miserably. Although it has fs bump at 300Hz, which can be eliminated with RCL circuit – I don’t think (hear) it’s worth it. And finally tweeter has a very sane 4kHz fc and smooth 2nd order roll-of.

Phase@2Meters. Blue – woofer, Red – midrange, Green – tweeter.
And the most important change – phase tracking. Beautiful synchronicity trough (almost) all of the octaves. If you don’t believe it’s importance, then you didn’t have a chance to do a simple AB test with same speaker being phase coherent and not. I urge you to do so – it’s eye-opening. I like to aim to achieve perfect coherence at listening distance and not at a standard 1 meter. Subtle change, but nevertheless sometimes audible.

Speaker impedance – 5Ω minimum.
I tried to keep impedance as high as possible, so same minimum 5Ω as in original network. This profile shouldn’t be a problem to even most wimpy couple watt’s of SE tube amplification.

Measured dBSPL @1Meter. 1/12 octave smoothing. 4ms gate window. Tweeter axis.
And finally a real measured SPL. That little hump @1kHz is due to absence of beefy 1.2mH coils for woofer at the time of measurement. So I used 1mH one. It’s not there with proper 1.2mH as prescribed.
Update: If you wish to retain original attenuators, here is how you can do it.
*I would strongly recommend against leaving original attenuators, unless you are 100% sure they are in mint condition (or replace them with new ones). Otherwise 45 year old crackling pot in a signal path kinda defeats the whole purpose of a better quality components.

New HPM-100 cross-over network with original passive attenuators.
Couple small changes to C2011 and R3021 are needed to produce some more headroom for adjustments. Minimum impedance will stay above 4Ω even in hottest setting. It goes without saying that those front panel markings will mean nothing. Zero will not be “neutral” and +3 or -3 will make no sense either. Pioneer uses ~30Ω attenuators (even though they’re marked as 8Ω) so small rotation changes will produce noticeable SPL difference and I suspect getting right tonal balance might prove to be challenging. But if you like constantly fiddling with different settings – this might be fun.


Connection diagram for new HPM-100 cross-over network with original passive attenuators.
Some more impressions
I will begin by saying that it’s very different speaker now. It’s no longer HPM-100 – it’s something different altogether. If you are used to that exaggerated in your face nonsense that it throws at you, then you will be disappointed. I mean – you will be disappointed with every other change altogether, so don’t do it. Unless you are up to it. And what a change this is!
I had a chance to listen to this cross-over for a good week. Components I used to build crossovers were nothing to write home about. Simple PP caps and mostly cored inductors. Just a stuff from my “cross-over prototyping” box. But despite this mediocrity I managed to fell in love with that sound. Hard enough that I decided to publish it here and give it my signature of approval.
Now classical music is a breeze. There is 3 dimensional space which is filled with instruments that have their place. So imagining is improved immensely. It still has sparkle and bite but it’s more subtle and tamed. There are no messy sibilances and chaos. They suddenly do almost everything right. No problems with vocals – human voice sounds… like human voice. And this is how I know that I succeeded. At least in my own definition of success.
This new picture is very realistic and I would be hard pressed to say what is wrong with it. It’s more a case of a preferences now then anything else. It doesn’t sound like a modern speaker. But all the problems that were previously very troubling are gone now. So I’m happy to have retained basic virtues of this speaker. Throw at it some decent caps and air cored coils and I promise you will be in for a surprise. Big and positive one.
Circus leaves the town…
And it’s time to commit. Unfortunately another executive decision was made to go with an old cross-over. This is because of a couple of reasons. First one being the owners desire to retain as much of a resell value as possible. After my first impressions – he was ready to just flip them. And the second one – him being in a different country and not able to listen to a new cross-over. I don’t like convincing people to choose something. I like for them to listen and compare. Then there is no need for any further persuasion.
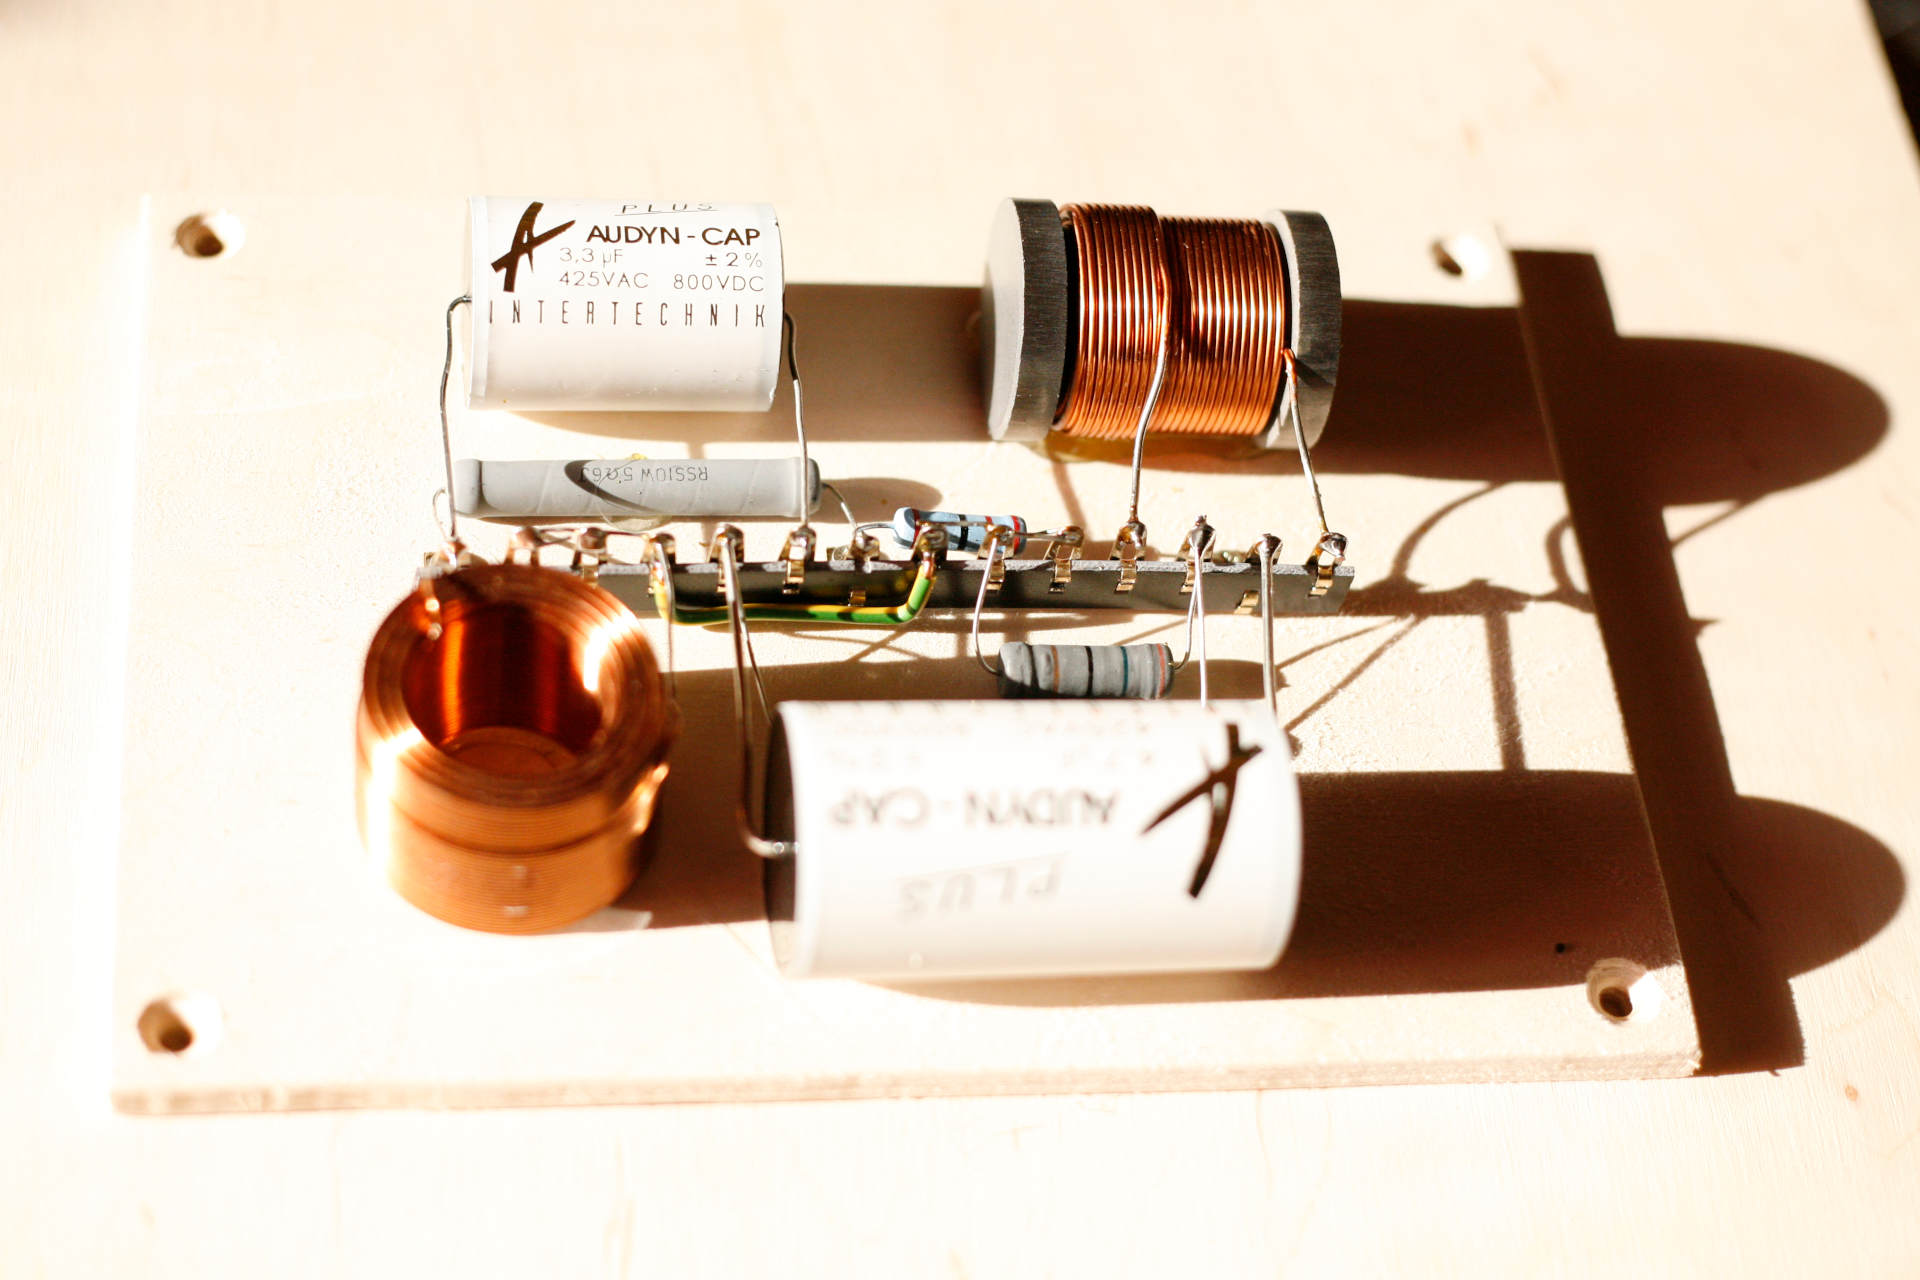

Factory HPM-100 cross-over network remade with quality parts.
Drivers got new wiring with an adequate cross-section speaker cable. New gold plated terminals were a nice finishing touch and that’s it. It went out to the owner!
Last thoughts
This was quite a journey for me personally and I enjoyed every minute of it. Having HPM-100 was a very old craving of mine and finally it’s over. It just shows you again that you have to be ready for some inevitable disappointments when facing your childhood dreams. So don’t forget to manage your expectations kids!
All the time I worked on these speakers I was under impression that they are just a clone of JBL L100. Now L100 are not a perfect speaker. Far from it. I had a chance for a quick listening session and I was equally not impressed. But the way they looked and felt were like something more real and more from pro audio.
I’m not saying that these speakers are terrible. I was just hoping for so much more. Would I own them in their original state? Certainly no. They have a right to exist and they obviously are finding their listeners. Just not my cup of tea I’m afraid. Would I own them with a new cross-over? Hell yeah. Just not as my primary speakers. I’m long past this “buy & upgrade” audiophilia phase and more into “build from ground up” now. But I’m sure they would find their place somewhere. And I know this might sound like a biased opinion – so be it. I stand by it.

My sole motivation for posting this long–winded story was to give a second chance for these speakers. I’m pretty sure I was not the first or the last dissatisfied customer. If you are in the same position or just feel a need for a change – give new cross-over a chance. It might shift your perspective quite a bit. I know it did for me.
And so it goes… Here are some more pictures of a final product.